3.1.1(g)-(h) - Exchange surface dissection, drawing and histology
This lesson is about using practical observation as biological evidence. You already know that exchange surfaces need a large surface area, a short diffusion pathway, and a maintained concentration gradient; here you learn how dissection, microscope slides and scientific drawings let you examine those ideas directly. The focus is not to memorise a long dissection recipe, but to record visible structures safely, accurately and honestly.
Why Observe Exchange Surfaces
Exchange-surface lessons often begin with diagrams, but practical biology asks a stricter question: what evidence can you actually see? A dissection gives a three-dimensional view of a gaseous exchange system, such as the gills in a bony fish or the tracheal system in an insect. A prepared microscope slide gives a thinner, stained view of tissue organisation, called histology.
Histology
Histology is the study of tissues using thin sections, usually prepared, stained and examined with a microscope.
OCR links this lesson to PAG2 for dissection and PAG1 for microscopy. That matters because the written examination can ask you to justify method choices, identify drawing improvements, explain safety decisions, or interpret what a described slide shows. It should not reward an invented detail that was not visible.
The two practical views answer different questions.
| Practical view | What it is good for | What to avoid |
|---|---|---|
| Gross dissection | Locating larger structures, seeing their arrangement and deciding what to draw | Cutting too deeply, damaging delicate exchange surfaces, or copying a textbook diagram |
| Microscope slide | Seeing tissue layers, air spaces, blood vessels, thin walls or repeated structures | Over-labelling structures below light-microscope resolution or treating the slide as living tissue |
The skill is to turn visible biological evidence into a clear, labelled record, while keeping the limits of the method in mind.
Dissecting Gaseous Exchange Systems
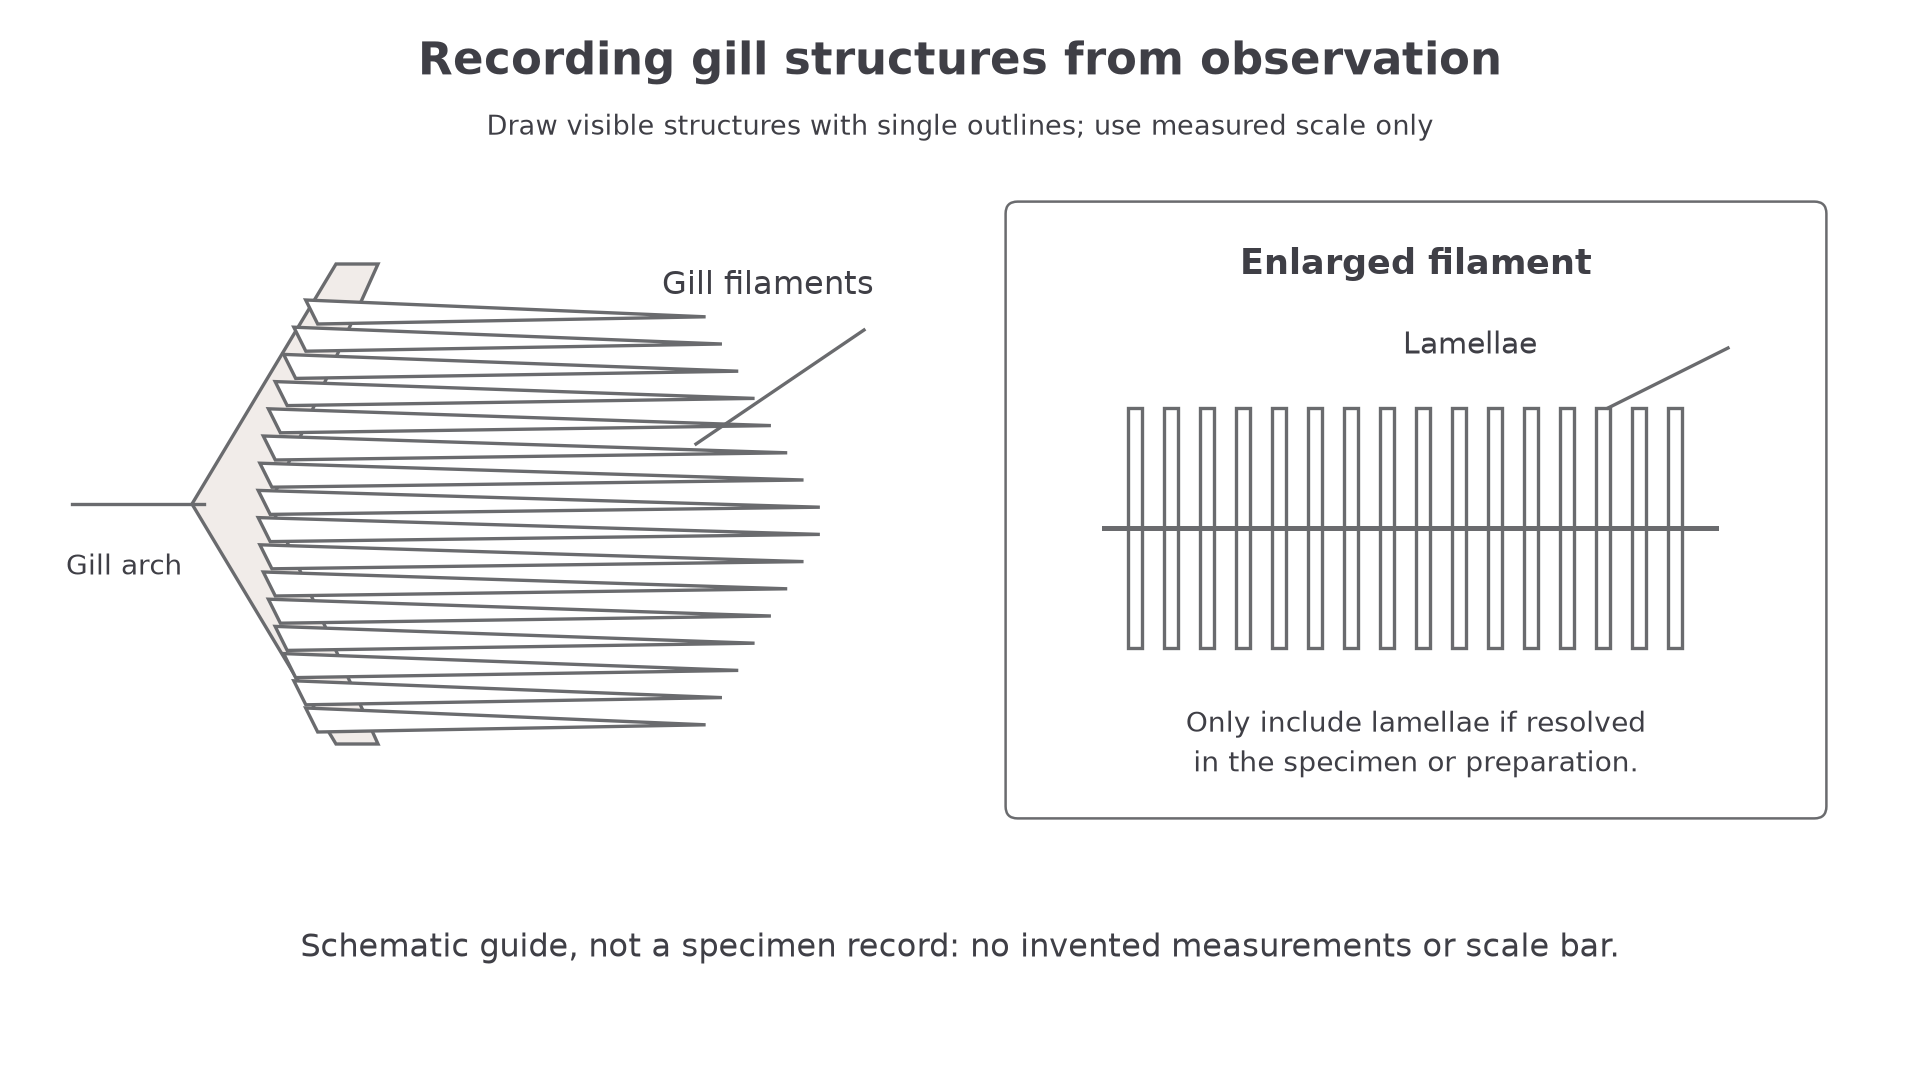
In a bony fish dissection, the main aim is to expose the gills without destroying their fine structure. The operculum can be lifted or removed carefully to reveal the gill arches and gill filaments. If the specimen is suitable and the tissue is well preserved, the lamellae may be visible as fine repeated plates on the filaments. Those lamellae are easy to damage, so the best dissection is often the least dramatic one.
[DIAGRAM: asset_name: Gill arch, supported filaments and an enlarged filament with lamellae as observation targets; asset_slug: 058_m03_1_1_exchange_surface_dissection_drawing_and_histology__diagram_01; description: Gill arch, supported filaments and an enlarged filament with lamellae as observation targets.]
Safe and useful dissection is controlled. Use forceps, a seeker and dissecting scissors for most of the separation. A scalpel is for fine cuts, not for hacking through tissue. Only one person should be actively dissecting at a time, and animal material should be handled with good hygiene because tissue fluids, preservatives and sharp instruments are all practical hazards.
An insect option has a different scale. Spiracles may be visible externally, while the larger tracheae can appear as pale or silvery threads when the body cavity is opened or when a small piece of tissue is mounted on a slide. For a suitable preserved insect, secure the specimen in a dissecting tray, make shallow lateral cuts under supervision, and lift the body wall with forceps rather than pulling on the tubes. Keep the preparation moist with the supplied medium; a dissecting microscope helps distinguish tubes from other tissue. Fine tracheoles may not be visible in a simple temporary preparation, so a good record says what was observed rather than claiming every part of the tracheal system was seen.
For a practical-method answer, "use a scalpel carefully" is weak on its own. Strong answers name the risk or validity problem: avoid deep cuts, preserve delicate filaments or tracheae, keep the specimen moist, and expose structures without tearing them.
Scientific Biological Drawings
A biological drawing is a record of observation, not a piece of artwork. It should be large enough to show the relevant structure, drawn with single clear lines, and free from shading or sketchy outlines. You draw what you can see: if a lamella, trachea, air space or tissue boundary is unclear, you do not invent it to make the drawing look complete.
Labels identify visible structures. Annotations go one step further by adding biological meaning, such as "thin wall gives a short diffusion pathway" or "many lamellae increase surface area". Labels and annotations should be precise, but they should not crowd the drawing.
Low-power and high-power drawings have different purposes. A low-power plan drawing records tissue layout: regions, layers, air spaces or larger structures. It normally does not show every individual cell. A high-power drawing can show a small number of representative adjacent cells or fine structures if they are genuinely visible.
Adding scale to a drawing
A student draws a gill filament. The actual filament is 8 mm long. In the drawing, the same filament is 64 mm long.
Use the same units:
64 mm / 8 mm = 8
The drawing magnification is ×8. A title could read: "Bony fish gill filament, drawing magnification ×8."
Continue this lesson.
You’re previewing NovaLearn without an account. Create a free account to read the rest.
Create free account