Core practical 5 - Root-tip squash and mitosis
A root grows partly because cells near its tip divide. In Core practical 5, you will learn how to prepare and stain this tissue, recognise mitotic stages under a light microscope, and turn observations into drawings, cell-size measurements and a mitotic index. You will also distinguish what a prepared slide shows from what it cannot establish.
Choosing tissue and preserving a snapshot
An actively growing root provides many cells at different positions in the cell cycle.
The root apical meristem is a region of dividing cells just behind the protective root cap. Its small cells have relatively large nuclei and are less elongated than cells further from the tip. Choose healthy, actively growing garlic or onion roots rather than an old, brown or damaged root. A mature region may give a clear slide but contain few dividing cells, so selecting the correct tissue is part of obtaining valid evidence.
For the fresh-root method below, a technician grows garlic cloves with their root bases in contact with water until roots are about 1 cm long. Growth time varies, so inspect the roots rather than assuming that a fixed number of days guarantees suitable tissue. Several roots provide replacements if one is damaged during preparation; several independently grown plants are needed to assess variation between plants.
Fixation
Treatment that kills cells and preserves their structures sufficiently for later examination, retaining a snapshot of the tissue rather than a living sequence.
Some school methods use roots fixed in advance. A validated example uses a technician-prepared mixture of three volumes of absolute ethanol to one volume of glacial ethanoic acid for at least two hours. This preserves material for later staining. Concentrated acid and flammable ethanol require the technician's risk-assessed procedure, suitable storage and separation from ignition sources. Students should use supplied fixed material under its own instructions, rather than mix fixative or add a fixation step to a different protocol.
The complete fresh-root protocol in the next part uses warm dilute hydrochloric acid and toluidine blue; it has no separate ethanol–ethanoic acid fixation step. These are alternative preparations, not interchangeable timings. Acid softening makes the tissue easier to separate; staining increases contrast. Neither is a substitute for explaining the purpose of fixation. Following treatment and squashing, the preparation cannot be used to watch an individual living cell complete its cycle.
A field containing many stages therefore shows different cells caught at different stages. Arrange those observations using the established sequence from 3.10; do not describe the photographs as a time-lapse of one cell.
Softening, staining and making a thin squash
A useful preparation separates stained cells into a thin layer while retaining recognisable chromosomes.
Carry out this practical in a supervised laboratory using the centre's risk assessment. The following is a coherent fresh-garlic method adapted from the SAPS root-tip practical. Use its specified concentrations and timings together; other validated protocols may differ.
You need rooted garlic, a cutting tile, dissection scissors, a mounted needle and paintbrush; labelled vials, a beaker, watch glass and separate dropping pipettes; 1 mol dm⁻³ hydrochloric acid, supplied 1% aqueous toluidine blue and rinse water; a 40 °C water bath, timer, clean slides, coverslips and paper towel. Microscopy also needs a compound light microscope, eyepiece graticule and stage micrometer.
Preparation sequence
- Wear eye protection and the protective clothing/gloves specified for the supplied reagents. A technician sets a vial of acid upright in a supporting beaker and equilibrates it in the 40 °C water bath for about 15 minutes.
- Using the garlic's support, immerse the roots in the warmed acid for 5 minutes. Lift out the clove carefully and rinse the roots with water.
- On a tile, use dissection scissors to remove the terminal 3 mm of two or three roots into a watch glass. Keep these growing ends, including the meristem; discard the older tissue into the designated waste.
- Cover the tips with a drop of 1% toluidine blue for 2 minutes at room temperature. Remove excess stain and gently rinse with water using a separate pipette.
- Transfer a tip to a clean slide with the paintbrush. Add a drop of water and gently tease the tissue apart with the mounted needle. Lower a coverslip at an angle to reduce trapped air.
- Rest the slide flat on the bench, wrap it in paper towel and press gently and vertically over the coverslip to spread the tissue. Keep the coverslip stationary sideways. Stop if the glass cracks; a teacher handles the broken glass.
Why the steps work
Warm acid helps hydrolyse the pectin-rich material joining adjacent cell walls, so the tissue separates and stain can penetrate. It does not simply dissolve all the cellulose walls. Too little softening leaves overlapping clumps; excessive treatment can damage the material. Toluidine blue gives chromatin strong contrast, making condensed chromosomes easier to distinguish. It does not create chromosomes or trigger mitosis.
Squashing aims for a layer approximately one cell thick. Overlap can make two nuclei look like one dividing cell; excessive force or lateral movement can rupture cells, move chromosomes and break glass. Use the approved gentle procedure rather than pressing harder whenever an image is unclear. An unstained or poorly stained field, air bubbles and thick tissue are preparation problems, rather than evidence that the root has no DNA or no cell division.
Dilute acid can injure eyes and skin, warm liquids can splash, and stains can contaminate skin and clothing: use the specified protection, small controlled drops and prompt rinsing/reporting of splashes. Keep fingers behind the cutting edge and cut on the tile. Handle slides by their edges, and put sharps and chemical waste in the centre's designated containers. Use only the small number of cultivated roots needed; avoid collecting scarce wild plants and dispose of treated plant tissue as instructed.
Focusing and recognising mitotic stages
Locate the right tissue at low power before examining chromosome arrangements at higher power.
Place the slide securely on the stage with the coverslip uppermost. Select the lowest suitable objective and set the illumination and condenser/diaphragm to give useful contrast. Watch from the side when moving the objective close to the slide, then look through the eyepiece and focus by moving away from the specimen. Use the coarse focus only at low power, following the microscope's instructions. Scan for a thin region of small meristem cells, and centre a promising cell before changing objective.
Move to the 10× objective and then the 40× objective as appropriate. With a 10× eyepiece, these give total magnifications of 100× and 400× respectively. At high power use the fine focus; the objective is closer to the coverslip and coarse movement risks collision. Recheck light/contrast and focus through the small depth of the specimen. A larger image is helpful only if useful detail is resolved. Use an ordinary dry 40× objective without adding immersion oil.
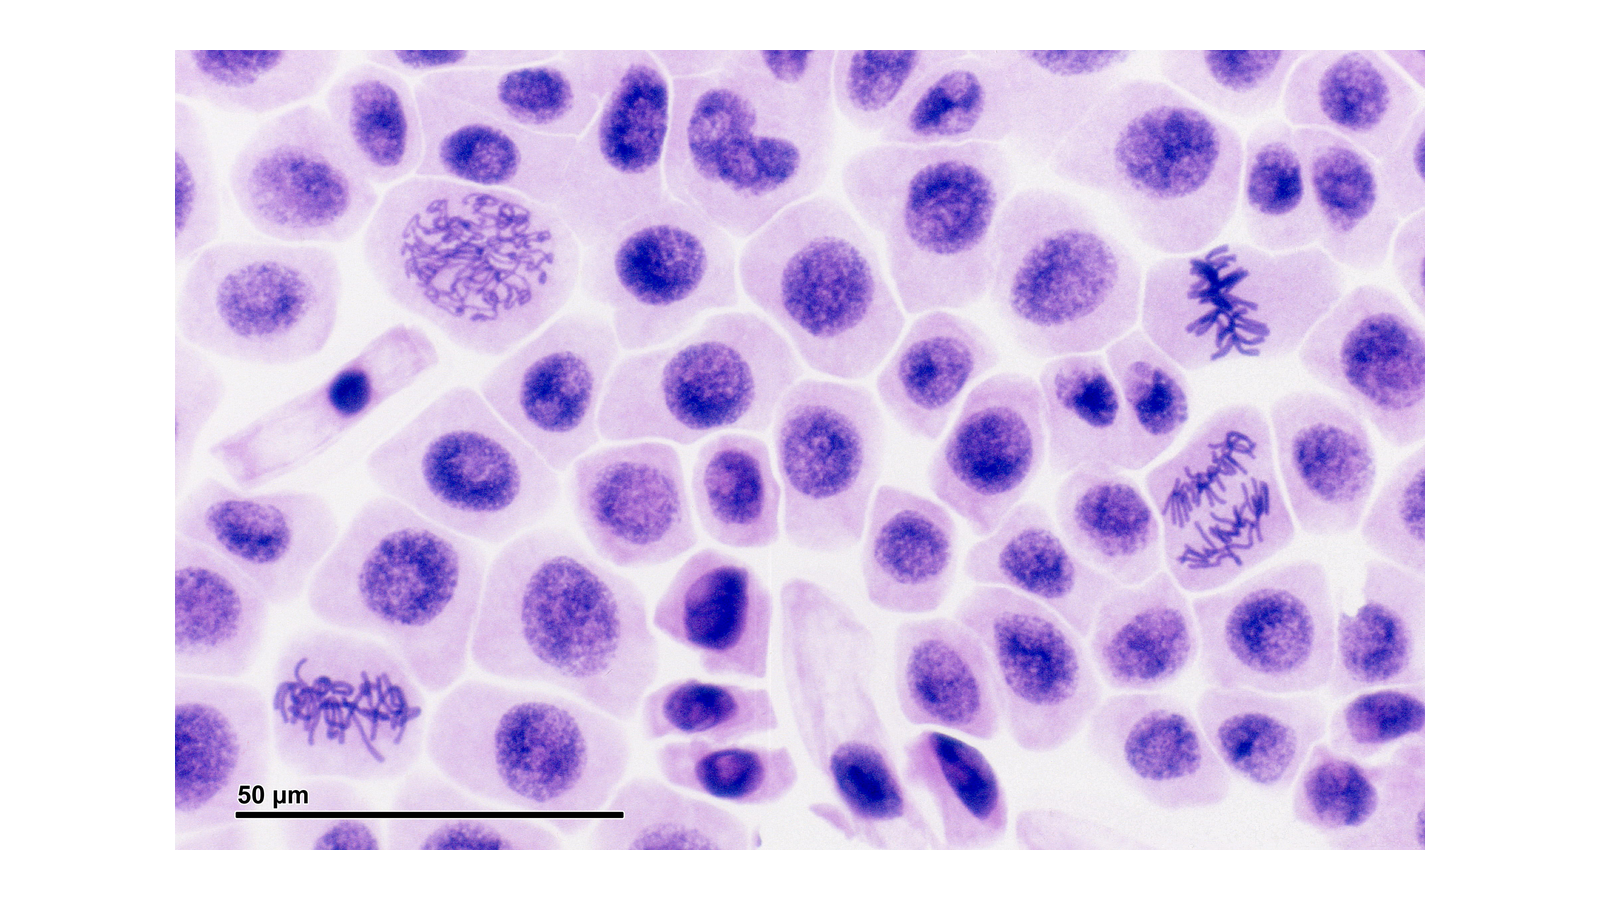
Figure 1. Bright-field onion-root squash photographed by Josef Reischig, from his archive via Wikimedia Commons, CC BY-SA 3.0. Whole photograph uniformly reduced and placed on a white frame; no cells retouched. The original bar represents 50 µm and resizes with the photograph. The source's print magnification is not the magnification of your current screen.
Use the chromosome arrangement, not just staining intensity, to recognise a stage:
| Observation | Interpretation and reasoning |
|---|---|
| A bounded nucleus with diffuse/granular chromatin; no distinct separated chromosomes | Interphase: DNA is present, but individual chromosomes are not resolved as compact mitotic bodies. Interphase is not a stage of mitosis. |
| Chromatin condenses into visible threads/bodies, without a single equatorial arrangement | Prophase: chromosome condensation is apparent. In Figure 1, the conspicuous tangled threads in the upper-left region provide an example. |
| Condensed chromosomes grouped across the cell's equatorial region | Metaphase: alignment between the poles. The clear compact chromosome arrangement in the upper-right region provides an example. A view down the spindle axis may look like a rosette rather than a straight line. |
| Two visibly separating groups of condensed daughter chromosomes, with space between them | Anaphase: sister chromatids have separated. The chromosome groups in the right-hand region below the metaphase example illustrate this. |
| Two chromosome groups becoming less condensed and two daughter nuclei forming; sometimes a developing cell plate | Telophase: nuclear re-formation. Late stages can be difficult to separate from cytokinesis or two adjacent interphase cells; check that both nuclei belong within the same cell boundary. |
A mitotic spindle is essential to chromosome separation, but its fibres may not be visible with this stain and school microscope. Do not add them to an observation record merely because the mechanism predicts them. The cell wall also means plant cytokinesis forms a cell plate; a cleavage furrow is not the expected feature here.
Mitosis is continuous, while stage labels are categories. If overlap, poor focus or a transitional arrangement makes a cell ambiguous, record the uncertainty and follow a stated classification rule. Never force every dark patch into a named stage or claim that every X-like mark is a whole visible chromosome.
Recording a scientific observation drawing
A scientific drawing communicates what was visible in a selected field, with scale and annotations that another observer can interpret.
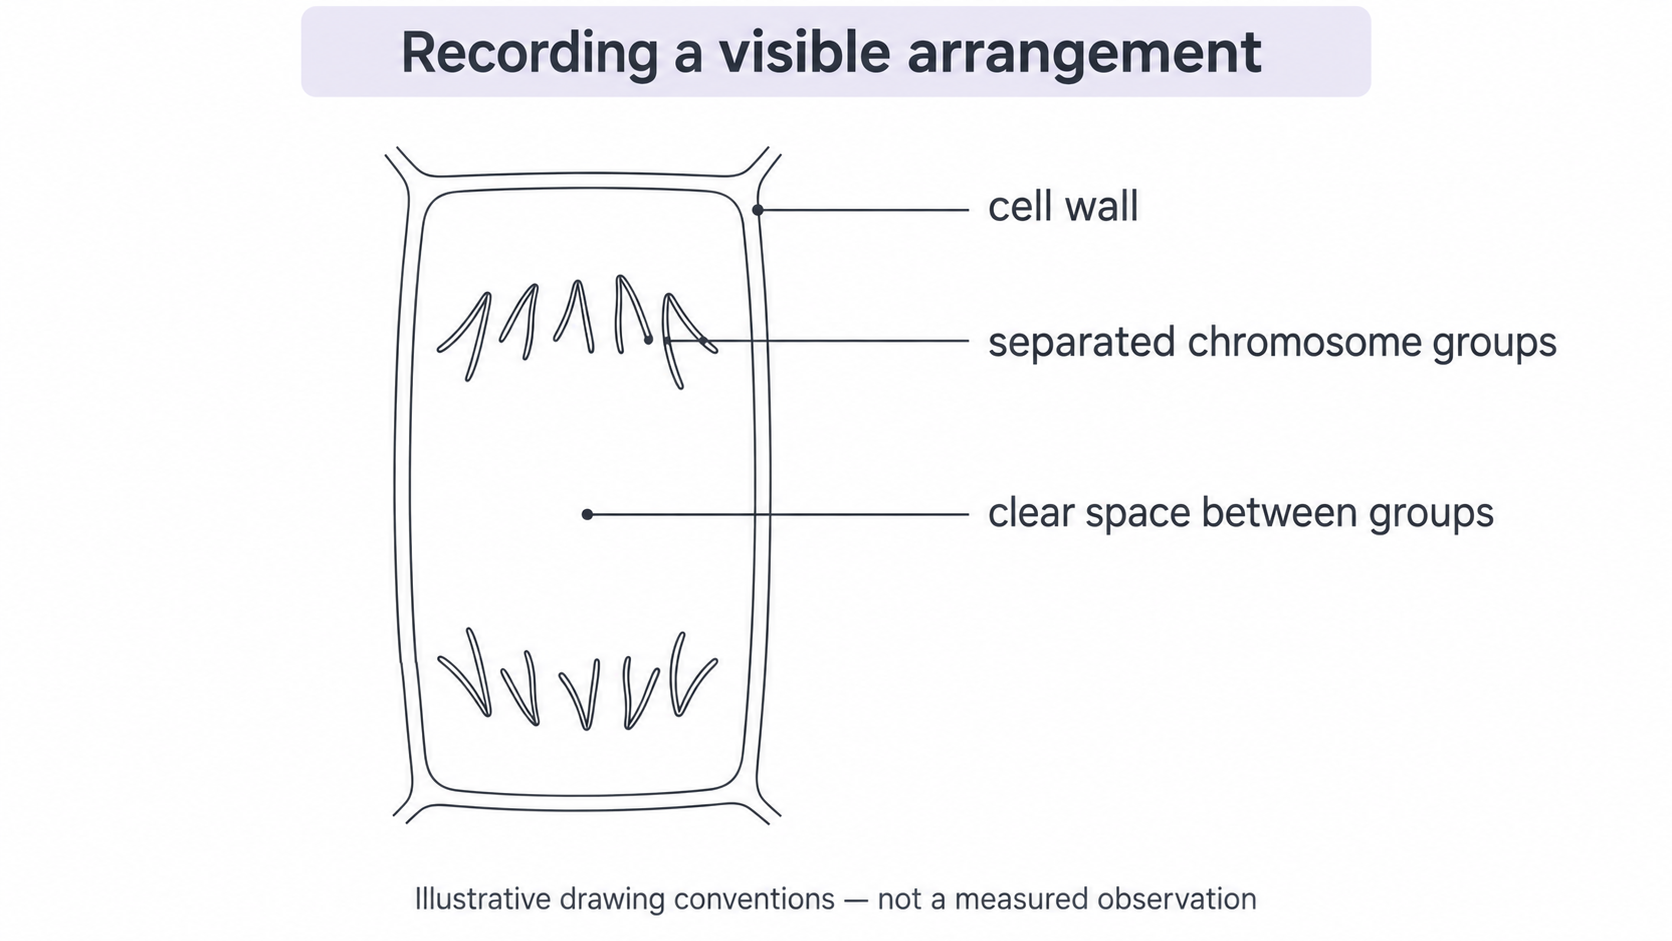
Choose a clear cell or small representative group and make a large, sharp-pencil drawing on paper. Use clean single outlines, retain relative sizes and positions, and avoid shading that obscures structures. Draw the actual wall shape and chromosome arrangement; do not replace them with a memorised perfect diagram. Use straight, non-crossing label lines that terminate at the feature and add concise annotations such as “two distinct chromosome groups”.
Continue this lesson.
You’re previewing NovaLearn without an account. Create a free account to read the rest.
Create free account