1.1.2 - Implementing experiments
Carry out measurements correctly and keep a usable scientific record. Learn how to check apparatus, record raw readings with suitable units and precision, and distinguish measurements from observations and corrected values.
What Implementing Means
In OCR A Level Physics A, implementing is about carrying out a practical method properly once the method has been chosen. It covers three linked skills: using apparatus and techniques correctly, attaching appropriate units to measurements, and presenting observations or data in a scientific format.
Implementing
Implementing is the practical skill of carrying out an experimental procedure correctly and recording the observations or measurements in a usable form.
Good implementation is not just "getting some numbers". It means the apparatus is used in a way that matches the physical quantity being measured, the readings are recorded with enough precision for the instrument, and the record is clear enough for later processing.
For example, if a student measures the time for one fast oscillation using a handheld stopwatch, the reading may be dominated by reaction time. A better implementation might time 10 oscillations and divide by 10, or use a light gate if the motion suits that apparatus. The physics idea being tested has not changed; the quality of the measurement has.
In implementation questions, OCR often rewards specific practical actions: use the correct apparatus, use it correctly, record the reading with the correct unit, and present the data clearly.
The check below is about choosing apparatus for a short time interval, so focus on the measuring technique rather than the later calculation.
Using Apparatus Correctly
OCR uses the phrase "a wide range of practical apparatus and techniques" because the skill follows you through the whole course. You may meet rulers, balances, thermometers, newton meters, measuring cylinders, stopwatches, light gates, calipers, micrometers, electrical meters, oscilloscopes, wave equipment, lasers, data loggers and radiation detectors.
The common rule is simple: the apparatus must be suitable for the quantity and used in a way that avoids avoidable recording faults.
For analogue scales, view the scale perpendicularly to reduce parallax, check the zero where relevant, and estimate between divisions only when the scale allows it. For digital instruments, use the displayed value sensibly, but do not invent extra digits that were not shown. For electrical measurements, select a suitable range before taking readings. For moving objects, choose timing apparatus that can resolve the interval being measured.
Worked example: choosing and using apparatus
A student needs to measure the diameter of a thin wire for a later resistivity practical.
The diameter is small, so a metre rule is not suitable. A micrometer or suitable digital calliper is more appropriate. Before measuring, the student should close the jaws gently and check for zero error. They should measure the wire in several places and in different orientations if the wire may not be perfectly circular. Each raw reading should be recorded immediately with the unit used by the instrument, such as .
This is implementation, not evaluation: the student is not yet deciding whether the final answer agrees with an accepted value. They are making sure the measurement record is fit for later use.
Units and Raw Readings
OCR links this skill to recognising and using appropriate units. A measurement without a unit is incomplete because the number alone does not identify the physical quantity.
Appropriate Unit
An appropriate unit is a unit that matches the measured physical quantity and is clear enough for later calculation or comparison.
The unit may be the unit shown by the apparatus, such as , , , , or , but later calculations often require SI units. Record raw data honestly first, then convert when a calculation needs it.
Worked example: recording and converting
A digital calliper displays a wire diameter as .
In the raw-data table, a suitable heading is:
| reading | d / mm |
|---|---|
| 1 | 0.42 |
If the value is later needed in metres:
The table has preserved the original measurement, while the calculation has used SI units.
A raw-reading record should also show the resolution of the instrument through the number of decimal places. If one current reading from a digital ammeter is recorded as , other raw current readings from the same range should normally be recorded to three decimal places as well. If a digital stopwatch displays hundredths of a second, OCR guidance is not to record stopwatch readings to more than two decimal places.
Presenting Observations and Data
Presenting data means choosing a format that makes the observation or measurement understandable. Quantitative data usually belong in a table. Qualitative observations may need words, categories, a labelled diagram, or comments in a table. Some data later become graphs, but the implementation skill here is the clear record, not the later gradient or intercept analysis.
A strong table has:
- the independent variable in the first column where there is one
- dependent measurements to the right
- repeated readings grouped clearly
- processed values, such as a mean, on the far right if they are included
- quantity and unit in each quantitative column heading
- no units repeated in every data cell
- raw readings recorded to decimal places that match the measuring instrument
Worked example: improving a results table
Weak record:
| mass | t1 | t2 | average |
|---|---|---|---|
Improved record:
| m / g | / s | / s | mean t / s |
|---|---|---|---|
| 50 | 1.24 | 1.20 | 1.22 |
| 100 | 1.75 | 1.78 | 1.77 |
The improved version puts units in headings, keeps the data cells as numbers, and rounds the processed mean sensibly. It is also easier to scan because each column has a clear physical meaning.
For qualitative observations, the same principle applies. "The wire glowed dull red" is a clearer observation than "it changed". "The trace on the oscilloscope became taller when the input voltage was increased" is more useful than "the oscilloscope changed".
Checking and correcting readings
Checking an instrument means testing whether its readings represent the quantity you intend to measure. A zero check tests the reading at zero input; a calibration check compares the instrument with a known reference elsewhere in its range. Zeroing a balance does not establish that it reads every non-zero mass correctly.
For a ruler, view the scale along a line perpendicular to it, with a pointer or set square where needed. “At eye level” is useful for a vertical scale, but the essential point is the viewing direction: looking obliquely creates parallax when the object or pointer is separated from the markings. Check the zero mark or measure between two intact scale marks if the ruler end is worn.
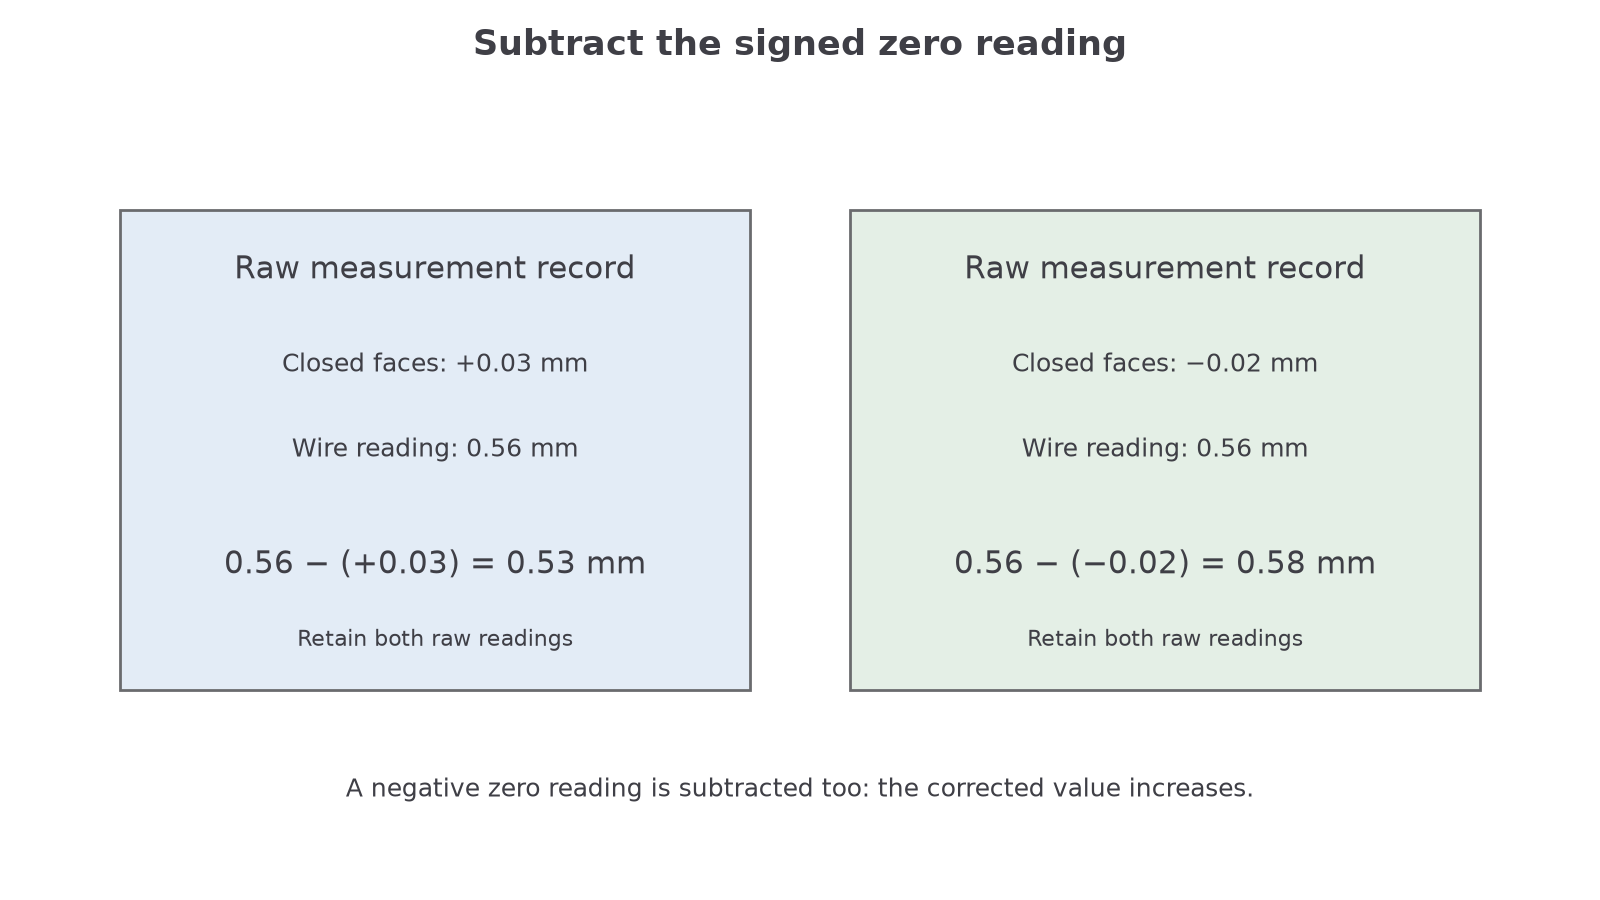
For an additive zero error, subtract the zero reading from every displayed reading:
A micrometer reading , with a closed-face reading of , gives . If the zero reading were , the corrected diameter would be . Record the original reading, correction and corrected value separately so another person can check the calculation.
[DIAGRAM: asset_slug: implementation_zero_correction; caption: Subtract the signed zero reading from the raw micrometer reading to obtain the corrected value.; description: Raw and corrected micrometer readings: subtracting a positive or negative zero reading, with units preserved.]
Select an appropriate instrument range and record the digits actually resolved by it. Record readings immediately, with units in the headings, and note a loose connection, changed range or disturbed apparatus when it occurs. Preserve the original observation if a correction is made; do not silently overwrite inconvenient data.